 I am starting to do custom orders again. I know it is
a little late for this Christmas (which is next Wednesday), but it is better
late than never I still have my Etsy shop,
Ebay, my Zibbert shop,
and a couple others, but I will be adding one sites like this new one (at least
new to me) called Selz.
I have place a link to it, and the prices will start at $20, depending
on how detailed I have the Mini albums. I also will be selling my retired items
from Longaberger as well on Selz. More
on it later.
I am starting to do custom orders again. I know it is
a little late for this Christmas (which is next Wednesday), but it is better
late than never I still have my Etsy shop,
Ebay, my Zibbert shop,
and a couple others, but I will be adding one sites like this new one (at least
new to me) called Selz.
I have place a link to it, and the prices will start at $20, depending
on how detailed I have the Mini albums. I also will be selling my retired items
from Longaberger as well on Selz. More
on it later.
Tuesday, December 17, 2013
A little late than never
I am starting to do custom orders again. I know it is
a little late for this Christmas (which is next Wednesday), but it is better
late than never I still have my Etsy shop,
Ebay, my Zibbert shop,
and a couple others, but I will be adding one sites like this new one (at least
new to me) called Selz.
I have place a link to it, and the prices will start at $20, depending
on how detailed I have the Mini albums. I also will be selling my retired items
from Longaberger as well on Selz. More
on it later.Sunday, November 24, 2013
On My Etsy Shop: Black and White Covered Notebook
What's Black and White and read all over? in this case it is not a newspaper, and that kiddie riddle suggested when I was a child. In this case the riddle should read, "What's Black and White and WRITTEN all over. In this case it would be a Black and White covered notebook. I am putting this up on my Etsy Shop as well. Perfect for anyone. The description on the list reads:
 Black and White items are part of a trend, and it has been for several years. One of the reasons why I love black and white is it goes with everything and they are neutral.
So i was thinking, why not have a covered notebook so that everyone, man , woman, and child can use it. it is not too girly, not to manly, and not too childish. Just right, and Goldilocks would say in the Three Bear's story.
Just like in the Amore Notebook, there are two pockets, one in the front and one in the back. The one in the back it for when you wan to slide papers in, while the front pocket is your traditional pocket. I hope you will enjoy you notebook if you decide to purchase it. All orders can be customize to fit your taste. Just let me know if you have any questions. Enjoy!
covered notebook: positive words
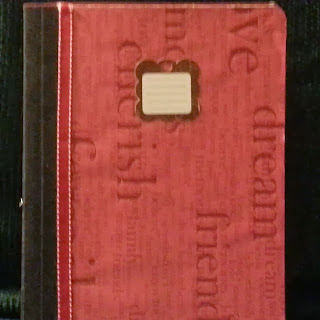
I must admit that I love this paper when I created this notebook. It gives so many positive messages from love to dream. My description on my Etsy shop is as follows:
Everyone needs a little encouragement, and positive words will do it each and every time. It lifts the spirits, and it makes a person fill good. I think that what happened when I picked out this paper. I had another purpose for the paper, but this worked out fine when I re-purposed it.
Some of the words on the notebook are "Love", "Cherish",and Dream. Red embossed with a little sparkle.
Have fun writing in this notebook and enjoy!

Saturday, November 23, 2013
On my Etsy shop: Covered Notebook: Amore
Another notebook is up on My Etsy Shop is Amore. it shows love, but you can use it any way you want to. The description is as following:
Love is the strongest language I know of. Love is one of those things that you do not have to say a word, just show it. You can also receive love as well.
This notebook reminds me of that love, and it also have this collage-feel about it. that is what I love about this cover. The inside has two pockets, one for the front and one for the back. You can place little notes or hold a pen. Enjoy!

Up On Etsy....World Traveler
This is my second notebook which will be posted on my Etsy shop. The description reads as follows:
 I love traveling. For me, it is good to just get away and see how the rest of the world lives. Right now, my traveling is restricted to just the United States, Canada, Mexico, or a cruise, but I would love to visit other places someday, like Paris, Italy, African, and maybe Japan. LOL, I have not decided yet where to start.
This notebook reminds me of those travels I would like to take in the near future. The patterned paper covering the notebook is that of an old world map, perhaps the kind that people like Magellan or Columbus would had. A red ribbon represents a book mark. A stick tag is so you can name your journal. Enjoy!
Up on Etsy….5 notebooks: Country Charm
Hello-
It has been two long months since I have posted on this
blog. I have posted on my other blogs,
but not P.Lynne Designs. Life got in the
way and I had some major home renovations and repairs to do in the house. I will not go into detail here. I plan on posting on here from now on out to
the end of the year.
The holidays are here.
In less than a week, we will all be eating turkey or whatever suits our
fancy here in the United States. I
understand that the rest of the world does not celebrate, and the Canadians had
their Thanksgiving last month.
I want to start out by first explaining that the notebooks I
did were part of a craft fair I did two years ago. I found them when I was cleaning out stuff,
sitting in a box. I have freshen them
up, and in some cases, did the inside cover with my signature pockets on
them. When I originally made them, I
realized that everyone needs a pocket to hold loose notes. The rest I left as is. As I find more stuff, I am going to put them
on my Etsy shop which it too has been neglected since the summer.
Below are the notebooks that I am putting up for sale:

As I said, I created this and all the notebooks two years ago. the listing on Etsy is as follows:
I decided to create and cover journals two years ago. I loved a notebook that I had covered that year a and thought to sell them in a craft fair. the fair wasn't that great, because there was 2-10 crafts fairs going on that year. none of the vendors made an outside sale that day.
Fast forward to 2013, and I decided to put them in my shop.
This notebook reminds me of old country wallpaper in a kitchen. My grandmother never had wallpaper like this but, if she did, it probably would look like that. On the inside is cover with rose cardstock, and the paper is standard notebook paper. Enjoy
Wednesday, September 11, 2013

Friday, August 30, 2013
Mini Book floral Swap Album completed
I just complete my first mini book in over a year. Although it was a rush job, it turned out pretty good. I am part of a swap, so this album is on its way to Toledo, Ohio in a few hours. I love how it turned out. The Album it a Tag book and it has two chipboard covers, and the tags are made from the Tags, Bags, Boxes and More retired Cricut Cartridge and #8 tags from Ranger The tags and book covers are covered with paper from DCWV (Die Cuts with a View) paper line's Primrose, which is a newer paper and Mariposa, which is an older paper line. I also have a couple of sheets of another paper line that was 6 x 6.
I used flowers from my stash that I have bought from either Joanne's or Big lots (yes they have scrapbook embellishments) The ribbon is adhesive ribbon that I turned into ties for the tag pages.
I hope you like the video I made.

I used flowers from my stash that I have bought from either Joanne's or Big lots (yes they have scrapbook embellishments) The ribbon is adhesive ribbon that I turned into ties for the tag pages.
I hope you like the video I made.
Wednesday, August 21, 2013
Things I am working on
I know, I do not have a layout, mini book, or card for you to look
at and learn how to make. I will share at the end of the week, so I am
getting there.
Mini books
I am working on a tag book for a swap, and
it is consists of the following ingredients:
Two chipboard covers (from
recollections-but you can find chipboard covers and place, and you can also cut
them out with a die cutting machine to get the shape you want.
#8 tags from Ranger. (In the green package)- I get these all the
time, but if you have a die cutting machine, you can cut these tags out. The measurements for the standard tag is 6.25
in x 3.25 in, with, or without the hole.

Other tags- the swap mini book did not give me an exact
measurement on how big the tags had to be, so I made bigger one almost as big
as the covers, which are small covers, measuring about 5 in x 7 in, but you can
have any size you need to.
The album is held together by two binding rings. Again binding is at your discretion. This is only the second time I have bound a
book this way.
Cards:
 |
| from the DCVW blog |
I have picked up a corrugated paper stack from DCWV, and I
am going to use on a set for my mom and a set to sell on Etsy. This company has hit it on the head this
time, because I wanted to know where to find this stuff (other than ripping up
a cardboard box. I will post when I am
finished with the cards.
Well that is it for now.
Be blessed my friend.
Tuesday, August 6, 2013
No layout Tuesday: Tips
 |
| Stock up (Copyright PLynneDesigns) |
I have a tip for you today:
stock up.
I am not talking about going out and grabbing every paper
line known to mankind or buying every new tool in the scrapbooking world, I am
talking about the basics.
This is tip is not only for people who are just starting in
the world of scrapbooking, but for anyone who has ever scrapbooks, sews, or make
containers out of gourds. Any crafter or
hobbyist. This tip does not apply to
collectors.
Step 1: Look for
anything that is being used on a daily basis or anything that you cannot go
without.
Step 2: Make a
permanent list of those items, like this:
Tape runner
refills
White color
paper and matching envelopes
Kraft color
paper and matching envelopes
Black color
paper and matching envelopes
Liquid glue
3-d squares
You get the picture. Suggestion: if you do not already know, your computer if
you use one, makes a great filling system.
Make this a file on a spreadsheet program like Excel, that way, you can
print out the list. If you do not like
that system, you can always have a little notebook, and write a permanent list
in the back of it. Here is a perfect
example a video showing an inventory
binder to take with you to shop. (I think I will make this one)
Step 3: go shopping
OK, this does not apply if you already have the stuff you
need but it helps. Catch things on sale
(Michael’s Joanne’s, and Hobby Lobby have weekly specials)
Step 4: buy what you
need for other projects. If there is a
project you are working on, buy for that project ONLY. This will help cut back on the clutter. Also use Peter Walsh’s technique for
combating the clutter. As you use,
replace, but you cannot buy another if you do not use it. If you want a new tool, sell
the old.
Step 5: organize your
space.
This part is a must.
The reason is with an organized work area, you can create better, and
think clearer.
I hope this little tip helps. Be blessed my friend
Wednesday, July 24, 2013
Summer 3 x 3 Note Cards with Envelops and Card Holder
Hello, and welcome to today's post-
A few post ago, I share with you on a design team blog hop a set of 8 3 x 3 #notecards with envelops and a #cardholder. They are now available for viewing on the P.Lynne Designs shop on Etsy.

A few post ago, I share with you on a design team blog hop a set of 8 3 x 3 #notecards with envelops and a #cardholder. They are now available for viewing on the P.Lynne Designs shop on Etsy.


Sunday, July 14, 2013
A haul and something I like to call shopping with coupons.
 I went to Michael’s Friday, and spent to get my money’s
worth. When you are looking for
materials that will make wonderful presents and products to be sold, make sure
you get your money’s worth out of the trip.
I did well and I feel like a Klingon coming back from a great battle (OK,
cheesy Star Trek reference…sorry).
I went to Michael’s Friday, and spent to get my money’s
worth. When you are looking for
materials that will make wonderful presents and products to be sold, make sure
you get your money’s worth out of the trip.
I did well and I feel like a Klingon coming back from a great battle (OK,
cheesy Star Trek reference…sorry).
So, without further ado, here is what I bought, and what I
plan with my supplies. Btw, this in a way has nothing to do with the
decluttering I am currently doing.
 This first item are tags. I use tags all the time, and they
are great for cards, scrapbook layouts, and mini books. I usually purchase them in either Kraft,
Black, or White because they go with anything.
I also have the Cricut cartridge, Tags Bags Boxes and More 1. There is a second cartridge which I have
access to from the Cricut Classroom should I need it. These were not on sale.
This first item are tags. I use tags all the time, and they
are great for cards, scrapbook layouts, and mini books. I usually purchase them in either Kraft,
Black, or White because they go with anything.
I also have the Cricut cartridge, Tags Bags Boxes and More 1. There is a second cartridge which I have
access to from the Cricut Classroom should I need it. These were not on sale.

I needed a smaller scoring board. Yes, you can use a paper trimmer, and I will talk
about that in an up and coming e-book for the essentials you need to get
started scrapbooking and card making, but I like the ease a scoring board. It was not on sale.

The last item I bought was a chipboard kit. I will use these for mini book covers. I will show you how I do it in a future video. What I like about this kit is you can get a
few good projects out of this kit. That’s 5 large books and 3 small books, and
I almost bought 2 of them.
A shopping tip:
Coupons
To save money, always look for coupons in the Sunday paper
and online. Be mindful of the expiration
date, because unlike grocery coupons, these can expire within a week. Many stores are starting to take on
competitor’s coupons more, but they have to be like items or the same item, so
be careful here as well.
Well that is it. I
created a little video of today, and I hope you will enjoy it.
Be blessed, my friend.

Saturday, July 13, 2013
Scrapbooking organization Declutter series #3: Ribbon, Laces, and other Fabric-like embellishments
One of the trends people who scrapbook love to do is take an
ordinary, everyday item, and make it part of the scrapbooking family of
supplies. Ribbons, laces and other
fabrics, which have long taken their rightful place in the sewing world, are
also part of the scrapbooking and paper crafting world. These items are used for every piece where
paper is often of for handmade crafts such as mini book covers, embellishments
on cards, and on alternated items.
Fabrics, like their paper counterparts can also be stamped on, made into
borders, and turned into flowers.
If you have a fabric stash alone with your paper stash, you
know or will learn very quickly that one small swatch can build up to your own
personal mountain if you are not careful.
So keeping them organized and undamaged is just as important as the rest
of your supplies. These rules applies to
all crafts from quilters to people who scrapbook.
First of all, find all of your fabrics. If you are saving a swatch of last year’s
prom dress you daughter no longer wants to wear, find the dress. Find that pile over in the corner, and bring
it in.
Now purge what you no longer need. Yes, I know, it has sentimental value to
it. Cut off a swatch and toss the
rest. Ask yourself this question, “what
project is this fabric for? If you do
not remember, go to question #2: can I
use it in another project? If the answer
is yes, put in the keep pile, if no, put it in the toss pile. Before you toss, ask yourself this
question: Can I donate it to a sewing
club, or of it is a something that you can wear, can it go to a thrift store or
consignment shop? If the answer is yes,
put it in the donate pile, if not either toss it, make it into cleaning rags,
or just throw it away altogether. In
your donation pile, call up your locate shelter to see if they can use it. Chances are there is a free store or a charity
who would be glad to take the clothing off your hands.
Now that you have purge what you do not need, it is time to
organize.
Develop a system. If you have been following along in this
series of decluttering your crafting supplies, that system might be the same
system that you developed to organize your paper. If not, may I suggest the ROY G BIV
system? The name stands for red,
orange, yellow, green, blue, indigo, violet, and I added an “N” for neutrals, because
you cannot have enough neutrals in your life.
Put the fabrics into like piles, and prepare to put them in
containers. This goes for all of your
ribbon, laces, swatches, and things like zippers.
Now it is time to shop…for containers, if you do not already
have them. I do suggest that it is a
container that is free from dust. The rolling
bins you see make excellent containers, because you can see what you have
inside. If must have a non-see-through
container, take a picture of the piece of fabric, that way you know what you
have in the boxes. They also serve as
excellent labels too. For spools of
ribbon, you can either put them on a pre-made ribbon holder or create on out of
dowel rods. They can go the length of
the wall. Laces can be put in see
through boxes as well. Label the containers.
Finally place all fabric in one common area of the room,
that way you do not end up playing the hunting game again.
Keeping up with fabric should be the least of your worries,
once you have a system down. Just remember
to not buy too much fabric, know the washing instruction and keeping that
information in a binder will also keep down the clutter.
Next time in part 4, it is rubber stamping time. Until then,
be blessed.


Friday, July 12, 2013
Quick Note Tip: 3 x 3 note card and envelope
 |
| These cards are currently for sale in my Etsy Shop (custom orders offered) |
Materials needed
- Cardstock (any size) cut into 3' x 6' strips
- Patterned Paper cut into 2 3/4' x 2 3/4' squares
- Small embellishments, if desired
- Small rubberstamps, if desired
- Ink for edging or rubberstamps
- Envelops (hand or pre-made) 3 x 3
- Optional: index cards with lines, cut slightly smaller than the inside of the card.
Instructions:
- Fold cardstock in half. Use a bone folder to crease.
- Note, you can also score at the 3' mark to keep the paper from splitting when creasing
- Adhere (glue) pattered paper, embellishment, or stamp on front of the card with rubber stamps.
- If you are using the lined index cards, adhere (glue) to the inside of the card.
Notes:
- Try to match the background paper with the envelops or use Kraft, Black, White, or Ivory envelopes.
- These note cards can be any size or shape you want. be sure that you have the right size card with the right size envelope.
- Perfect project for getting rid of large pieces of scraps
- For Packaging: use cello bags, boxes made for cards, or tie it up in twine or ribbon for the person who loves stationary sets.
By Unifyhandmade:
Thursday, June 27, 2013
Design Team Blog Hop-Close to my heart
I am taking part in another Design Team. This time, it is Kathy "Kat" Ancheta's team, and she just started her Close to My Heart business.
The Paper:
Kat sent me some paper's to make some projects, and I had a blast making these project. Out of a pack of 12 x 12 sheets of My Reflections paper called Avonlea, I made 2 layouts (12 x 12 and 8 x 8), a pocket, 8-3 x 3 note cards, and a card holder (which held the note cards). I am going to be honest and say that I am not crazy about the colors. I am a bright and cheery color person (mostly pinks and reds), but when you are on a design team, you may never get to work with you choice palette, and that is something that every designer, no matter what profession you design for. The purpose is to show those who do like the color combination and make it work for them. On to the projects.
12 x 12 layout.
 The purpose of 12 x 12 layout, in my opinion, is to put as much stuff on the paper, right? It depends. For me, it is the perfect size, and I like to fill every inch of space out there.
I purposely did not fill this page full of embellishments, because who knows what type a budget a person has. I filled it with just a simple white gel pen. It still allows you to look all over the page, not in just one area of the page. I worked with all the greens I have, with little specks of brown.
My first tip for you is do not throw away the labels on your 12 x 12 sheets, you may never know what you might find on it. The top of one sheet gave me what I like to call, "a Treasure Trove" I found the words, "Yesteryear" and "Family" on it. So I fussy cut them and place d them under and next to two of the pictures. The Journaling reads:

8 x 8 Layout.
Some people do not like big pieces of paper to do their layouts on, but for me, it is a challenge, and I won.
I cut the off white piece of paper down to 8 x 8, and the green pattered paper down to 6 x 6 and put it as close to the center as I possibly could. I placed a picture of me and my father almost in the center, and placed a cut out word "Family" On top (I know, I should have added ink around the edges-it looks better in person). the paper pack came with stickers, which was not so sticky. I had to add more adhesive (glue) on the back of some of the stickers. Also the word "Ties" was from the same pack of stickers.
Pocket
 If you make mini books like I do, you will appreciate this next element. A pocket. I was looking on You tube, and ran across this pocket, followed along, and produced this pocket:
I love this project, and it is so easy to make. there are a number of YT videos that show this particular card, just click on the link.
Note cards
I love make 3 x 3 cards. just cut one 12 x 12 sheet into 3 x 6 strips, fold in half. Simple. Don't forget to decorate your tops and add envelopes along the way.
 I decorated mine by fussy cutting the circle from another piece of Avonlea 12 x 12 paper and used the We R Memory Keepers corner punch (Scallops and clouds (using the scallops side) ) Again, these cards are good as a gift or for a quick note inside.
Card Holder:
I ran across this on Pinterest and had to try it, again super simple. the pattern is from the Splitcoast Stampers site.
Take a piece of 12 x 12 sheet of solid cardstock and cut down to 5 x 12. take your score board or trimmer if you do not have one, and score at 4 1/2 ans 6 1/2. take a punch and make a handle for both sides. Take a corner rounder to round off the corners (again used the We R Memory Keepers punch) two pieces of paper 2 3/4" x 3 3/4", and score at 1/4" and 1/2" . Use score tape or other double-side tape and put on the inside. secure it down.
I decorated the out side with the designer paper and with a windmill stamp that was given to me. I tamped with Mementos black ink, and colored with copic markers G-82 (Spring Dim Green) and B-97 (Night Blue).
I hope you enjoyed this post, and to close out, I will show you a video about the two layouts.
Have a blessed day.
The Paper:
Kat sent me some paper's to make some projects, and I had a blast making these project. Out of a pack of 12 x 12 sheets of My Reflections paper called Avonlea, I made 2 layouts (12 x 12 and 8 x 8), a pocket, 8-3 x 3 note cards, and a card holder (which held the note cards). I am going to be honest and say that I am not crazy about the colors. I am a bright and cheery color person (mostly pinks and reds), but when you are on a design team, you may never get to work with you choice palette, and that is something that every designer, no matter what profession you design for. The purpose is to show those who do like the color combination and make it work for them. On to the projects.
12 x 12 layout.
 The purpose of 12 x 12 layout, in my opinion, is to put as much stuff on the paper, right? It depends. For me, it is the perfect size, and I like to fill every inch of space out there.
 I purposely did not fill this page full of embellishments, because who knows what type a budget a person has. I filled it with just a simple white gel pen. It still allows you to look all over the page, not in just one area of the page. I worked with all the greens I have, with little specks of brown.
My first tip for you is do not throw away the labels on your 12 x 12 sheets, you may never know what you might find on it. The top of one sheet gave me what I like to call, "a Treasure Trove" I found the words, "Yesteryear" and "Family" on it. So I fussy cut them and place d them under and next to two of the pictures. The Journaling reads:
"There is nothing like a Parade at Walt Disney World. It does not matter if it a Caravan of Characters (Epcot Pic #1), a hyper Tigger and his sad Eeyore friend, or a bunch of prince an princesses. Everyone always loves a parade."

8 x 8 Layout.
Some people do not like big pieces of paper to do their layouts on, but for me, it is a challenge, and I won.
I cut the off white piece of paper down to 8 x 8, and the green pattered paper down to 6 x 6 and put it as close to the center as I possibly could. I placed a picture of me and my father almost in the center, and placed a cut out word "Family" On top (I know, I should have added ink around the edges-it looks better in person). the paper pack came with stickers, which was not so sticky. I had to add more adhesive (glue) on the back of some of the stickers. Also the word "Ties" was from the same pack of stickers.
 If you make mini books like I do, you will appreciate this next element. A pocket. I was looking on You tube, and ran across this pocket, followed along, and produced this pocket:
I love this project, and it is so easy to make. there are a number of YT videos that show this particular card, just click on the link.
Note cards
I love make 3 x 3 cards. just cut one 12 x 12 sheet into 3 x 6 strips, fold in half. Simple. Don't forget to decorate your tops and add envelopes along the way.

Card Holder:
I ran across this on Pinterest and had to try it, again super simple. the pattern is from the Splitcoast Stampers site.
Take a piece of 12 x 12 sheet of solid cardstock and cut down to 5 x 12. take your score board or trimmer if you do not have one, and score at 4 1/2 ans 6 1/2. take a punch and make a handle for both sides. Take a corner rounder to round off the corners (again used the We R Memory Keepers punch) two pieces of paper 2 3/4" x 3 3/4", and score at 1/4" and 1/2" . Use score tape or other double-side tape and put on the inside. secure it down.
I decorated the out side with the designer paper and with a windmill stamp that was given to me. I tamped with Mementos black ink, and colored with copic markers G-82 (Spring Dim Green) and B-97 (Night Blue).
I hope you enjoyed this post, and to close out, I will show you a video about the two layouts.
Have a blessed day.
Saturday, June 22, 2013
Scrapbooking organization Declutter series #2: Paper

Ah paper, a recycler’s worst nightmare and a scrapbooker’s
friend. Scrapbookers and paper crafters
alike use this stuff by the pound, it is not wonder that if you look at the
average paper crafter’s room, you will see it everywhere, from tags, sheets of
paper, papier-mâché’ boxes, die cuts, card blanks, and a whole host of other
paper goods. They decorate bags for
wrapping presents, sometimes the paper are the presents themselves, as well as
the card that goes inside the present.
If you are a recycler, this item can be a hit or miss for you. Paper crafting is not for the faint at heart.
One of the biggest problems, at least for me, is clutter
control. Paper to most people, even at
its beauty is considered trash to them, but paper can be contained, and no one can
tell that you have paper around.
1)
Find all of your paper. If you are in the process of a project, the
paper is not in its raw state, which is the paper itself, leave it alone. If it is already neat, get it anyway.
2)
Purge the paper.
I am not talking throwing it away, but decide what pieces you are going
to use. Do not think in terms of what
project you have planned or were going to use the paper for at this point, and
do not say things in your head such as, “This would make a great layout
background.” If it has not been used,
and the original project has left the memory, ask yourself, “Will I use it in a
future project?” If the answer is yes,
put it in the “keep” pile. Do not return
it to the original container yet. If the
answer is, no, then put it in the “giveaway” pile. It no longer has sentimental value to you.
3)
Once you have done that to all of your paper,
place the “keep” paper in an area so you can sort it into a system. You need a system in order to contain
it. We will get back to this a little
later. Let’s tackle the “giveaway”
paper.
4)
At this point, you do not have the time to go
down memory lane with the giveaway paper.
It is now out of sight and out of mind when you plan your future
projects. Do not second guess your
decision. What you can do for it is to
decide where to send it. Let me give you
some hints:
a.
Your child’s school. Funding may not be what it used to be when
you were in school. Many programs have
been cut, and teachers have to fend for themselves with the salary they are
given. Often times, it may mean buying
their own supplies, including art supplies.
It would be a great help if your craft supplies go towards the
school. Call ahead or ask your child’s
teacher exactly what is needed.
b.
Nursing homes.
Even seniors need art to stay active, and that is often with art
supplies to keep their mind’s going, even if their bodies no longer function
like they used to. Nursing homes and adult
day care centers are under that same tax area that the government often uses to
cut funding at, and donating supplies do help the burden. Again ahead to see what is needed.
c.
Rehab centers.
This is for either people who have been injured or someone who has a disability,
and they are learning to be a functional citizen again. Call to see if these places mind having a
supply donation or does it have to be monetary.
5)
Sometimes products are too old or out of date to
be donated. For those, just toss in the
trash. Same with anything that is beyond
repair.
6)
Next move to the paper you decided to keep.
a.
First inspect each piece of paper. Not the size
and shape of the paper and put lie pieces together. At this point, you are not worried if the
color is the same. Put small with small
pieces of paper, die cuts with die cuts, and so on.
b.
Next, work with each pile, and put into color
families. Think ROY G. BIV or what I
like to call ROY G. BIVN (red, orange, yellow, green, blue, indigo, violet, and
neutral). So in an example, you would
have a Small paper ROY G. BIVN, a Medium sized paper ROY G. BIVN, and so forth.
c.
Place into containers. You may have to go shopping at this
point. If so, you will need 8 containers
for each separate pile. If you do not
have the budget for that, then just get 8 containers and put each same color
piles in a container, but make sure it is a system that you can live with, and
not feel overwhelm with it all.
d.
If you are dealing with lots of patterned paper,
try to find a common background with each paper, or separate by brand name.
7)
Last, find a place in your new space where the
paper should go. I am not going to tell
you where to put it, as long as you are comfortable with setting, and that it
is convenient for you.
Congratulations on organizing your sheets of paper. Do the same thing with your boxes, tags, and
other paper-like supplies. Step 3 will
be trying to organize Ribbons, laces, and other fabric type supplies. So get ready, and be blessed.
Friday, June 21, 2013
Scrapbooking organization Declutter series #1: Decluttering
| what's in the box? |
Hello,
In an exclusive that should be ONLY for a home organization
blog (AKA my blog Simply Organized Crafts), I want to bring to those of you,
who want to organize their craft rooms NOW, and not in the wintertime. I do have something for you at the end of
the series, so if you stick with me, I hope I do not disappoint you in any way.
Today’s Lesson: The
introduction and declutter the paper stack…
Introduction
So, you want a craft room (scrapbook room, sewing
room)? I can tell and you know why? Do you have the following problems?
1)
Do you have supplies so old, Methuselah could
come and say they are older than he is?
2)
Supplies
older than your first born child, and he is 23 years old?
3)
When you craft, do you have to run upstairs for
the paper, downstairs for the glue, and in the basement for the album?
4)
When you go into your “space” to do your nightly
crafting, do you cry for lack of room to place the sewing machine (die cut machine,
paper trimmer…etc.)?
If this is you, stop wondering if you have enough room in
the backyard to erect a store (In some cases, I do not think the apartment
manager will not allow it). You do have
the room, and you will make it work. All
you need is to do a little purging of the supplies, and maintain what you have
left. This is a baby step process, so if
you want to read through what needs to be done first, and then do it, that is
perfectly alright. I am going to refer
to my scrapbooking supplies, but this applies to anything crafting medium (i.e.
needlework, sewing, wood working)
Step 1: Declutter
Decluttering the paper (or any supplies) is the hardest
thing that a person has to do. When you
first start your craft or hobby, you are so excited, you buy not only the
basics, but everything else that is out there in the market for your particular
craft. I like to can this the baby
stage. You do not know what you are
doing. There is nothing wrong with
it. You will get overwhelmed with the
new craft, but you learn and you buy (a lot).
Over the months and years, if
you do not use it all because you bought a paper here, an embellishment there,
a new pair of scissors 15 months down the road, the supplies will build up, and
take over your space. The very first
rule to declutter is realizing that you need to declutter. First
of all, say with it with me, “these
supplies did not come here overnight, so they will not leave here overnight.”
Once you realize that, you are only half way there. Did you know that part of decluttering your
supplies is a mental and emotional process?
You may realize it, but are you really ready to get down and toss some
stuff that has been sitting there for all eternity? I have heard some people say that their
supplies are put in a will for their children to enjoy long after they are
gone. My question is to that statement
is, “will it be the stuff you are currently using, or the supplies you got when
scrapbooking became popular?” If you
are not using the paper you bought for a project in 1994, why do you still have
it in 2013? Scrapbooking has evolved between
the years, and it is about time you play catch-up.
As you start to declutter anything, from scrapbook paper to
China your grandmother gave you before she passed away, ask yourself these
questions:
1)
Am I using it now?
2)
What project would this best fit if the original
project ceased or took a different turn for the better?
3)
Do I love it so much that I cannot bear to part
with it?
4)
Can it be replaced?
If the answer is yes to any of these questions, or if you
have not used it in a year or more, get rid of it. If not, try to use it with 6 months to a
year, and if you have not used it, give it away. If it is damaged, and it cannot be repaired,
why hold on to it? If it is good, and
you do not like it, give it away or sell it.
For craft supplies, that means give it to a school or nursing home that
could use the supplies, or sell it on a website like Ebay or Etsy.
Next time, we will start the decluttering and storage
process with our first item, paper. I
will show you why you want to declutter, how to declutter, and where to store
the paper you kept in hopes you will use it in a project in about 6 months to a
year. Until then, be blessed, and have
fun as you create your new craft or hobby room.
Friday, June 7, 2013
Graduation Party
Well, it is that time of year again, where proms give way to the pomp and circumstance, where the leaders of the school give future leaders a proper sendoff, and mothers still remember like it was yesterday they were sending their graduates off to their first day Preschool, Kindergarten, 1st grade, and so on.
I still remember the day I graduated from Independence High, in Columbus, Ohio. In fact, two days ago marked my 31st year since that day, where I said goodbye to the staff that dealt with my brand of studying for the past 4 years. I will save that story for another day. These days, students have it made. They get to go out into a world, where technology can be used in every turn, including the classroom. If I even looked at a calculator hard enough, that was grounds for getting expelled, or at last a day in the detention room. There was no such thing as bring a cell phone to school. In fact, when I was 16, I did not know what a cell phone was. (oh, yeah, it was that great big brick they used on the Six Million Dollar Man to call from). They also need to remember what type of world they live in too.
 Anyway, I am attending a graduation party today. A friend of the family's son is graduating, and of course, like any good scrapbooker and card maker, I made a card for such of a occasion. At first I wrestled with the idea, because I do not make many masculine cards. But now I have it.
Materials for this card:
I made the pocket using Kathy Orta's hidden hinge method. If you are not familiar with it, you can view it here. I am very please with the way the card turned out.
Well that is it for today. I will show you what I made from the paper pack that I received for the blog hop later, but be sure to come back Next Thursday for the blog hop.
Be blessed.

I still remember the day I graduated from Independence High, in Columbus, Ohio. In fact, two days ago marked my 31st year since that day, where I said goodbye to the staff that dealt with my brand of studying for the past 4 years. I will save that story for another day. These days, students have it made. They get to go out into a world, where technology can be used in every turn, including the classroom. If I even looked at a calculator hard enough, that was grounds for getting expelled, or at last a day in the detention room. There was no such thing as bring a cell phone to school. In fact, when I was 16, I did not know what a cell phone was. (oh, yeah, it was that great big brick they used on the Six Million Dollar Man to call from). They also need to remember what type of world they live in too.

Materials for this card:
- Card set with card blank and envelop. I used a brand from Hobby Lobby, but I have also used Recollections from Michaels and the Archiver's brand. All three are just a like to me, which are thick and not flimsy.
- Doodlebug's Cap and Gown Collection. I used the borders for all three and the stickers for the tag.
- Ranger tags #8 Kraft cut down to fit the card, because I made the pocket for the card from Bazzill Kraft color cardstock.
- White gel pen.
- The "E" is from an old letter set. So old that the adhesive (Glue) dried use on the letter, so I had to re-stick it.
I made the pocket using Kathy Orta's hidden hinge method. If you are not familiar with it, you can view it here. I am very please with the way the card turned out.
Well that is it for today. I will show you what I made from the paper pack that I received for the blog hop later, but be sure to come back Next Thursday for the blog hop.
Be blessed.
Thursday, May 23, 2013
Quick note: what up: design Team
Hello, I have a quick note before the sleepy meds (aka my blood pressure medicine) kicks in and makes me sleepy. I just got word that I will be helping someone get their Close to My Heart business off the ground. This means Design Team. So this means at least once a month (?) You will see something that is all close To My Heart (CTMH) products. I am glad to be helping out.
I have to be totally honest here. I was going to start selling Stampin! Up products soon, but being on someone's CTMH's design team may actually convince me to sell Close to My Heart instead of S!U. Stay tunes as I do this, she will be sending me product starting Monday.

I have to be totally honest here. I was going to start selling Stampin! Up products soon, but being on someone's CTMH's design team may actually convince me to sell Close to My Heart instead of S!U. Stay tunes as I do this, she will be sending me product starting Monday.
Friday, May 17, 2013
Obsessed with Scrapbooking: Two New Layout Based Cricut Cartridges Released Today!
 |
| My cartridges -copyright 2013 by P.Lynne Designs |
Do not get me wrong, I still love my many machines and the brand, but to me, Provo Craft still has a lot of growing up to do, and from what I can tell on my end, that growing up process is slow and steady. I am still need to do 2 years worth of updating to get my Imagine to talk with Cricut Classroom (CCR), while my E2, 5 (Expressions 2, 5th Anniversary) is swimmingly happily working with it. (Is that even a phrase, "swimmingly happily?") E1 is waiting in the wings for the day that I have a cricut project in which all 3 machines are on, simultaneously, or E2 or Imagine decides that it is time to die. (End of Rant-- You can go back to your regular reading)
Anyway, I am loving this new attitude that Provo Craft is taking. The best news of all is about trying out cartridges before buying them. I said it in the last post about Cricut, and I am saying it again, What a God sent. I have 23 physical carts, 4 on the E2, and 1 I discovered they pre-loaded on the Imagine (You do know this? Right? I discovered while playing around with it one evening last year). It is not a true cart, but is helps to have some basic shapes on the darn thing, as much as it costs on HSN (Home Shopping Network) when it debuted. (Got mine secondhand for $250 less two years later). The process is simply: If you have CCR loaded into your computer or Laptop. Sorry, but no love for the Ipad, I tried it, and the software needs Flash to work it, and I do not think Apple is going to let it happen soon. I have looked at the cartridge, "The First Few Years, on the CCR software, and I love it. If you have a little one, it takes you from age 0 to 5 years, thus the first Few years. There are some basic shape on the cart as well. This does not have to be for baby, though. It can be for the first few years as a couple, in your new home, or even with your puppy.
Well take a look at the review this blogger gives on this cart and the cart, "When I was a Kid." I will try to make a layout based on the first one within a week before having to buy it. In the meantime, Read the article, and give her some blog love with a comment. Come back, and let me know you did. Have a blessed day.
Read Related Link: Obsessed with Scrapbooking: Two New Layout Based Cricut Cartridges Released Today!:

Tuesday, May 14, 2013
Share the Memories Freebie Kit | MyMemories
Get a freebie here from share the memories: Share the Memories Freebie Kit | MyMemories:
Some of the ways you can use this kit are:
Some of the ways you can use this kit are:
- Page elements
- Homemade cards
- Mini Books
- Altered items (like boxes, bags, and book markers)
All you have to do once you download them is print them from your printer.
Want more freebies? just sign up for a free subscription.
Thursday, May 9, 2013
Tip: How to use brochures and maps in a scrapbook page...Part 2
Paper choices
Yesterday, I show up to deciding what photos to use, and how large to make your layout. Today will be all about paper choices, embellishments, and putting it together.
Paper choices is just a matter of cardstock or pattern paper for background paper. The trick here is to use the photo as a color reference. If not, the photo will clash with your color choice. I am looking at my photo, and I really so not see a whole lot of colors that can clash with it. There is the red of the brick, greenery is green, the sky is almost white, and the buildings are beige-like. This is great, just what I have hoped for.
I went with a beige cardstock for a background, but I did not stop there. You will just have to see the finished product at the end of the post. Now let's put it together....
 Step 1: paper. At this point of your little project, layer any papers on the background paper. This is the part where you can play around with your brochures and other items if they are made of paper. I plot mine almost in a collage-type fashion, but I did not overlap except in one tiny area. At this point, If you have any paint or stain mists (like from Glimmer Mist or Lindy's Stamp Gang), now is the time to use it.
Step 2: Place your photos. I have only one, so I put it sort of in the middle of the page.
Step 3: Embellishing: If you have any embellishments, put them now, but not too many. You do not want to take the main focus off the photos (if you have any). Also do not be afraid to copy the back of the brochure, if you only have one, or you plan on using it more than once, as long as you use it for your own personal use. In other words, do not sell anything on the brochure or the brochure itself, Ebay sellers. Yes, obey the copyright rule.
Step 4: Journaling. After after everything has dried and you have done you last bit of arrangements on the layout, write about it. If you are telling a story, answer everyone's curiosity, by taking a journalist approach. Answer the who, what, when, why, and how questions. another approach is what I did, labeling, which just answers the who or what questions. Always remember to date it, even if it just the year. I put the year, but I let the photo answer the "when did you take the photo" question.
 Step 5: Enjoy your masterpiece. You have earned it. Now you are ready for the summer. now I have one more step into Layout Land....DON'T FORGET THE CAMERA, THERE ARE MEMORIES TO CREATE!
Have a blessed day.

Yesterday, I show up to deciding what photos to use, and how large to make your layout. Today will be all about paper choices, embellishments, and putting it together.
Paper choices is just a matter of cardstock or pattern paper for background paper. The trick here is to use the photo as a color reference. If not, the photo will clash with your color choice. I am looking at my photo, and I really so not see a whole lot of colors that can clash with it. There is the red of the brick, greenery is green, the sky is almost white, and the buildings are beige-like. This is great, just what I have hoped for.
I went with a beige cardstock for a background, but I did not stop there. You will just have to see the finished product at the end of the post. Now let's put it together....

Step 2: Place your photos. I have only one, so I put it sort of in the middle of the page.
Step 3: Embellishing: If you have any embellishments, put them now, but not too many. You do not want to take the main focus off the photos (if you have any). Also do not be afraid to copy the back of the brochure, if you only have one, or you plan on using it more than once, as long as you use it for your own personal use. In other words, do not sell anything on the brochure or the brochure itself, Ebay sellers. Yes, obey the copyright rule.
Step 4: Journaling. After after everything has dried and you have done you last bit of arrangements on the layout, write about it. If you are telling a story, answer everyone's curiosity, by taking a journalist approach. Answer the who, what, when, why, and how questions. another approach is what I did, labeling, which just answers the who or what questions. Always remember to date it, even if it just the year. I put the year, but I let the photo answer the "when did you take the photo" question.

Have a blessed day.


Wednesday, May 8, 2013
Tip: How to use brochures and maps in a scrapbook page...part 1
When most
people travel, they bring back with them a ton of brochures of places they have
been to. While this is a good thing to show the family what they have
been missing while you have were away having fun, it can be clutter, unless you
do something about it.
In this
example I am going to use my 2004 trip to Disney. You got that right,
2004, and I collected tons of brochures and maps of the parks, which have
change a lot since I was there.
 |
| Box of 2004 brochures and maps |
They have
been in a box waiting for me to do something to them since that trip. See
the welcome home folder? I was at the time a Disney Vacation Club member, so
that was my welcome home folder with all the goodies me and my family received
on that trip. I have the membership card sitting next to me, also ready
to be put in a scrapbook for my viewing pleasure. Now a word from the
organization experts about this sort of thing: "If you have not
used it in a year, toss it, give it to charity, something, either use it or
lose it." My words, their thoughts, and they are right, but I did
not toss it in 2005 like I was supposed to. The only proper way is to use what
I want and toss the rest away. After all, I will be getting new ones in
December, including and hopefully a new DVC Card.
Now you
can go about this two ways (there are more, but for now, let's stick with two
ways): scrapbook with or without photos. If you scrapbook with
photos, make sure you have photo friendly paper behind the photo, since the brochures
are not printed on that kind of paper. This is great when you have people or characters in the photo or
want to highlight something special (baby enjoying her first Dole Whip).
You can always get archival mist, but that can be a bit on the messy
side, and it might make the colors in the brochures run together. If you
decide to go this route, make sure you test first. The second way is
without photos, and this is for when you did not take any, they turned out
horrible, or you want to keep something like a Smash book. For this
example, I am doing a layout with photos, because I found them. (Do not
ask, just know that I found them, LOL)
Step #1:
Gather your photos. I would start by separating the majority of
them by scenery, areas of the park, or themes. like this

Do not
let this pile fool you. It is only temporary, if you let it. The
photos are not going to deteriorate that fast, but you do have to do something
with the pile of photos. if you are not going to work on them for a
while, get a photo-friendly envelope, which are available in most places with a
photo kiosk near by (such as a drugstore or a local scrapbooking store (LSS)).
As you can see, I wrote down where I took the photos and the date of the
photo. Since it has been so long, I placed the year on to the slips of
paper. A paperclip or rubber band will do until you can put them in
envelopes.
Back to
the layout...
I decided
for the purpose of this demonstration to go with this photo:

To me,
this started my day (even though we had been to Epcot the day before)
Now that
I have choose my photo (and feel free to choose as many as you like, just do
not over crowd your background paper). I decided to choose to scrapbook
around this one.
Step 2:
Will it be one page or two? Oh and while I am at it, what size will
it be?
The
beauty of scrapbook albums is you can use pages as an one or two page layout
spread. I am usually a two spread layout girl myself, because I want to
get the most bank for my buck with two pages. This time, I want to
challenge myself and so a one page. This is great for a layout for one
photo. Since you will be using your brochures and maps as well, you can
easily have one layout for the photo and those materials and the other for just
the brochures.
Well that
is the end of this post but not the end of this layout, stay tuned for part 2
where I will show you how to choose your paper, style and other goodies.
Have a blessed day


Subscribe to:
Posts (Atom)