Showing posts with label Craft. Show all posts

Thursday, March 9, 2017

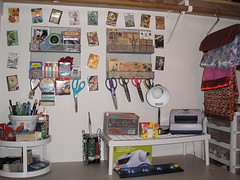
Tool Organization

Photo Collage by P.Lynne Designs
Hello, it has been a minute since I posted something on this blog.   I am slowly getting back into my routine.
Today, I want to talk about tool organization.  As crafters, we have many tools to deal with that are part of the trade.  This is a brief guide into how to organize them in one spot. I am actually going through an organization process myself.  First, a brief background on my personal organization:
About 10 years ago, my father bought a house and it was meant for me to live in.  When he and my mom asked me about the house (actually a 2-bedroom condo), I liked the condo, but I was not totally sold on the place.  Well, for him that was good enough and ended up moving in.  Well, it has been over 15 years later, and I am ready to move into a new place, but since moving in, I have accumulated some stuff and started a business.  I am bursting out at the seams, and I am tired of being the longest person to live in the 4-unit quadruplex.  (side note:  if you are not a smoker, smoke travels through walls, and it is not very pleasant smelling either)
So, this first process is to purge and put (as I call it) all my stuff so I will not have a ton of unwanted stuff moving into the new place when I buy it with me. 
Since this on my craft blog, and I am only going to cover what is needed to organize the crafting items, but this system (if you call it that) works for any area of the room, and if you are moving or not.
1.      Plan.  This is my first action of getting it done.  This includes the day, time, and month of the planned decluttering.  One warning:  do not plan this just before you are ready to close on your new house and the new buyers are ready to close on your current house.  You need time to process the task and deal with unexpected issues.  (good or bad). 
2.      Location.  If you are not moving, but moving the location of craft room, know where you are moving the stuff to, even if it is just across the room.  You need room to put the stuff, especially, if the room is doing double duty (i.e. Craft room/guest room).  In my current home, I have two rooms that are pulling double duty.  My second bedroom (which is upstairs) is a craft room and a guest room.  My dining room is actually pulling triple duty (Home office/craft room/eating space).  I am hoping that my next home will at least have 3 bedrooms.
3.      Am I going to use it?   Let’s get real for a moment.  How many of you watch the HSN’s (Home shopping Network’s) 24-hour craft day?  Now, how many of you when you watch this channel see an item, like how the demonstrator shows the product, falls in love with it, and next thing you know, it is on your doorstep days later?  Guilty as charged.  In fact, today is that special day, and I have 2 products coming as I write this. Almost 3, but I had to remind myself that I have a cruise that I am leaving for in September.  Anyway, next thing you know, it is collecting dust.  I have two We R Memory Keepers products that I must use or get rid of.  If you use your stuff, congratulations, now skip this step.
4.      Finally, get rid of it for good.  Do not hesitate on this step.  Do not say, “I will use it next week.”  That was step 3, and it is finished.  If it a fairly new item that is still on the market, do not buy it back when you see it in the store.  In fact, have a “no buy” month for crafts, unless you run out of something WHILE you are working on a project.  I have seen women have a no buy month and talk about it on Facebook.
5.      Place in its permanent home.  Or in my case, carry with you.   Use it when you are finished purging, and give yourself a 2-month rule (or if you follow Peter Walsh, his rule is 6-months).  If you are not at least thinking about using that tool in a project, toss it out, or donate it a school or Senior center.
So, that is the basis for this project.  It can be a big project or small, your choice.  I am going to use steps 3 and 4 on the tools, using my stuff:
Step 3 and 4: Am I going to use it?  Gather all your tools and look at them. Pick up each tool, and try to remember why you bought it in the first place.  Ask yourself these questions:
·         Was it a good deal?
·         Do I even know how to do the craft that it was meant for?
·         Have I made anything with it since I bought it?
·         Do I have any planned projects that uses it?
·         Finally, Can I do without it?
An example of this question and answer had to do with today.  On one of the segments of this 24-hour craft day on HSN, I ran upon a Cinch.  In case you do not know what, a cinch is, it is a book binding tool.  You can punch holes with it, and using wire binding or spiral binding to build a book, you can “cinch” it closed.  I already have one, but I have had trouble with it since day 1.  I bought it when I was working at Archiver’s, but I did not have the heart to bring it back with me to work the next day to get a new one, because the binding machine was heavy.   Anyway, there was a special today for the newest one, and I have been going back and forth to buy that one to replace the one I have.  “Sold”, said the online ordering area, as I looked up from my Ipad. So now when it arrives, I need to get rid of the cute pink one I currently have.  It is still good except I was having problems with two of the pegs.  I could donate it to a school, rec center, or senior center, warning them of that default, but it must leave my house.  I did have planned projects with it, but I could not bear using it one more time, without crying in frustration.  I make books and it is time for me to start back.  I have a cruise to go on and bills to pay. So, to answer the last question, no, I cannot do without it.  I also have an extra Cricut Electronic Die Cutting Machine I am no longer using.  It is an Expressions 2 5th Anniversary edition, and I am happily using an original Cricut Explore (with a Bluetooth adaptor).  I need a Cricut Explore Air 2 to help with the current one.   These are real examples of the decisions you have to make when decluttering your tools.
Step 5:  Placement.  Before you start step 5, you should have a place to put the tool.  If not, repeat step 4.    Assuming that you know where your tool is going, you simply find a table, if it is big enough or a container to put it in.  nothing should be stacking up in a mess. It should be neat and tidy, like you do not have it.  My craft room space 1 can be seen by all when I open the front door, Upstairs, not so much, but the same rule applies.  For my Cricut and Cinch, I need a table to use them on, and for other tools, I need plugs, tables, and just a space to store them in.  Your space may be different from mine, but it is supposed to serve the same purpose.
No matter what tools you use for your craft, it is important to find the room to use them in, as well as the space.  Declutter well, and declutter often.  This goes for your other stuff as well, such as paper, fabric, adhesives (glues), the tiny objects of the trade (embellishments).  Soon you will have a space that you will be proud to work in.


Saturday, December 29, 2012

Got Christmas Cash...Stock up on supplies

PC150535 - Craft Corner
(Photo credit: _kristin_)
One of the joys of Christmas is getting money to play with.  That I got, and I am ready to go.  But wait.  before you go spend that hard earned Christmas cash that great aunt Emma on your hubby's side gave you, because you are a loving great niece in law, think about what you need first.  After all, if she is not a crafter, you do not want her to think you are a spender.  If she is a crafter, go for it, but still think about something nice in the craft department you want to spend it on.  Next think about your supplies, and what is it you consume the most on.  For me, that is score-it tape.  It seems I do not have enough of it, and I need an extra roll in case the big blizzard of 2012 (or is it 2013) comes and snows me in.  Last, if you have anything left, either save it (if the aunt is not a crafter) or use a coupon and buy what's on sale.
So I got my cash present from my dad, and first of all I need a house phone.  Like many people, I still use this thing, and current one has been messing up.  I have not broke down to just use my smartphone as the primary phone, but I am getting one that does not have an answering machine attached to it.  My dad is not a crafter, so that would make him proud.  Next, i need a new score board.  Again, I have not used my trimmer as a score board, and I have the old Score-pal, and it is driving me bats when I follow the instructions on where to score the project, and I do not have that score line.  I have not decided if I want Martha's or the new Score-pal.   The advantage of Martha's over Score-Pal's is the envelope feature, which I really do not need since I have at least two Cricut Cartridges that have envelopes on them.   I have a 30% coupon from Archiver's, so I will see.   Whatever's left, I may get a couple of supplies or save, or go to the casino with it next week. (Yes Columbus has a casino and a racino (horse track casino).
So you can have your supplies and have fun at the same time.  Look for deals, but stay within your budget,and enjoy your new toys (I mean supplies).  Be blessed.
Enhanced by Zemanta

Wednesday, October 24, 2012

Happy Birthday Cupcake card

Ready for cute birthday card?   The card uses the same paper that I used for my niece's card, but there is a difference.  This one is more square, and I fussy cut a cupcake to place in the middle of the card.
So the materials you would use on this card is as follows:

Materials


  • A card blank measuring 5"x 10" folded into a 5"x 5" card.  Cut about an inch off to leave a place for the border.
  • A piece of patterned paper measuring about 4" x 5"
  • 2 pieces ( cardstock and patterned) of paper measuring 1" x 3"
  • A rub-on or sticker sentiment
  • A rubber stamp or digi stamp of an image you can color.
  • Strip of glitter tape
  • copic markers (I used RV23 (Pure Pink), R29 (Red Lipstick), R23 (Rose Mist), RV21 (light Pink) ), or your favorite way to color.


After cutting an inch off the front cover, I the mat on, put the two 1"x 3" pieces together and put the Happy birthday sticker on the patterned paper.  I popped it up with dimensional stickers.  Then I colored the image with the copic markers and fussy cut it.  Next, I backed it with a scrap piece of brown cardstock, cut around it leaving a 1/8" border, and popped it up as well.  lastly, I put a strip of glitter tape on the part that was not cut off.

That's it.  I hope you enjoyed look at my card, and I will see you next time.  Be blessed everyday.
Enhanced by Zemanta

Friday, July 13, 2012

Save time and money: Make your own kit...Part 2


The best solution is to make kits on your own, and you can do it with your current stash.  The rule here is to not buy anything except consumables (glue, tape runner supplies anything you can purchase at a dollar store)
First, choose your paper.  Will it be a cardstock or a patterned piece of paper?  This is your background piece of paper. Next, choose 3 or 4 pieces of coordinating paper.   If you background is a piece of cardstock, picking coordinating pieces is easy to do, but what if that background piece is a pattern paper, how do determine which is the dominate color?

Take this piece of paper for instance.  I have this stack and I have used it for a mini book, a background pie
ce of paper, and I love it.  I normally do not work with corals and their coordinates, but this stack by DCWV called Mariposa got me very "Springy" this year.  The first thing you will notice about the paper is the Multicolored background.  I have one piece left, and the first piece I cut out to make tags for the mini book I made in May.   The challenge for you is to let the paper "speak" to you.   I can use light green or even the pinkish area where the writing is.  But I am going to go with the red flowers, and base my kit off of that.  Since the paper is thicker, I would even call it patterned cardstock paper, in fact I am looking at the cover, and that is what DCVW is calling it.  3-4 sheets would do, and you can even adjust from that. 
Next are the embellishments.  With this piece of cardstock, you do not need to make it as busy as it already is, so in my case I would just stick to one or two piece of ribbon or even a button or two.  If I had another sheet of this cardstock, I would make it one of coordinating pieces of paper and cut some of the elements out of it, especially if you do not want some things covered like the birdcage or the corner butterfly.  Some papers lend themselves to that aspect of the scrapbooking process, but you can make that decision as you are in the actually creation of the page itself.  You are just making the page kit right now,
Finally, if you have photos in mind, add them, but make sure they are in photo safe envelope.  You add then to the kit now, so that you do not have to look for them later.  It is also ok to do photo placement on a page, and mark on the back with a photo-safe marker where on the page you would like to place them. You can always adjust when you make the page.  Make sure the kit does not clash with the photos.  So in other words, make sure that someone is wearing red or there is an object that is red or even another color on the background paper.  It is Ok if you decide to swap out later.
Finally you want to put all of this in  a folder that is photo safe or one of those project folders.  If you do not have one, you can pick one up at Walmart if you do not have a Michaels, Jo-Ann's, a local scrapbooking store nearby. Even stores like the Dollar Tree may have some.  Make sure that your largest piece fits in side.  Make several kits, and if you are a card maker, you may want to make some of those too, in case the mood make hit you to make a card, or if you need one for an occasion.  You do not have to put your sentiments in the kit now, but it is will save you time if you have it already stamped or printed up.  Saving money is wonderful and people are busy.  So isn't time you start making scrapbooking and card making kits?
Now if you will excuse me while I go make some kits.  I am running low. 


Enhanced by Zemanta

Monday, July 9, 2012

You got a scrapbook Kit, now What?


Say your BFF (best friend forever) has this idea to get you a scrapbooking kit.  She see this kit that speaks to her, but it may not speak to you.   She knows you scrapbook and thought she would do you this favor.  You receive the gift, but you do not like the papers or anything about it. Do you return it to her, explaining that you papers are not you, or except it graciously.   Except the gift.  After all it is the thought that counts.  You can still use the papers and who wouldn’t want free paper anyway.  Here are some tips on how to make the kit work for you.
  • Keep in mind your kit, put together by the company, and put together colors and styles that are trendy to that company.  Some of these companies uses the Pantone color system.  This is the same system that helps interior decorators and fashion designers decide on the in colors for the year.  This is not a bad thing, just swap out your papers, or throw in some paper you like to go along with the kit.
  •   For the papers and embellishments you do not use in the kit, you can make mini books, cards, and other scrapbook layout.
  •   For a different twist, there is nothing wrong with splitting the kit up.  It is the same thing as I explain before.  If your kit include chipboard items, such as a mini book, a pad of paper, and some embellishments; you have three or more new projects in just that one kit.


The point here is to making a kit work for you, and not the giver.  You friend meant well, and most likely when she got the kit, she thought of you.  This also tip also works if you are in the store and buy a kit for yourself.  Next time I will talk about how to put together a homemade kit

Enhanced by Zemanta