Monday, August 22, 2011

Are these the cutest things: re-post from Tricia's basket's blog


For the last few days in August, I am featuring items, that would make perfect gifts. (OK so I am getting a big jump on this)
Halloween Travel cups (2)

BACK TO SCHOOL MONTH AND HALLOWEEN:

It is a little early, but today’s feature is the Halloween Travel Cups (2 for $36; 1 for $18).  Last month, Longaberger debuted a Horizon of Hope Travel Cup.   I have one, and love it. FINALLY, something I can place in my car’s cup holder, without it spilling when I turn the corner, or make a sudden stop.  Well this month, it is the Halloween version of this cute little cup that holds a lot.   I am not big on the holiday, but I love my cup (yes I have this one too).  It does keep hot drinks hot, and cold drinks cold.  This cup makes great first day back at school teacher’s gifts.   I do not have kids, but what fun it would be, if for a teacher’s gift, he or she opens up the lid to find hot cocoa mix or one of the instead coffees in there.   I can think of all kinds of goodies for the teacher to put inside the cup.  If you do not have a teacher, how about a boss, co-worker, or  mailman,  As a added bonus, When you purchase two of the cups, you will receive free coffee.   This is Longaberger’s Private Reserve Arabica coffee blend, and it is delicious.
Let me explain some features about the cup itself…it measures 3 1/2” d (top) x 2/1/2”d (base) x 5 1/4 h, and it holds 10oz, so that is 2 more ounces then your average 8 oz. cup.  It is a Woven Traditions pottery piece, but it is double-walled, to allow the outer wall of the cup to stay cooler the inner wall.   The cup base is Vitrified-safe to be use in the microwave, oven, dishwasher, and freezer.    The top is made of silicone, which is included.  Please remove the top before placing item in the microwave.  Also note: Take caution when using around children, make sure the lid id on tightly before drinking
I also want to advise, that if Halloween is not your holiday for decorating and using all things Halloween, These travel cups are also available in the Woven Tradition colors (Sage, Cornflower,Butternut, Paprika, Ebony, Ivory, and Chocolate;  as well as in the Sisters line of Celebration, Golden Fields, and Medallion.), and as always, just as durable.
So I ask you once again, are these cute?  Visit www.longaberger.com/patricialogan to see these and other August specials.

Saturday, August 13, 2011

No card, just announcements

Hello-

I am just here to have a normal conversation.  I have no complaints, headaches or anything like that.

New Website:

I am building a new website through WordPress. In fact, I am building three.  I am finding that the things I want to present on Blogger are getting too limited.   That does not mean I am getting rid of this blog as of yet.  if I, I will probably will not happen until Mid-2012 at the latest 2013.   My reasons are simple.   I have too many friends whose blogs I follow on my Blogger account.   I have not decided how long I am going to keep Etsy, whose embedded app is handled nicely on Blogger.  

My shops:

I will tell you right now, I do not have as many things set up on this Etsy shop as I would like to.  I just got rid of Artfire, who decided that paying customers are the best customers, and decided to turn many basic account customers like myself into paying customers.   I am not mad at them, I just cannot afford it right now, if people are not buying.  So not worth the $10 I would be paying each month.   When I start getting people who will buy from me, I may rethink my decision.  E-Willow is just currently sitting there with no new items either.   I  want to put an area on my new website where people can buy, because I can have a Paypal cart set up where it would go straight to Paypal.   Once I have everything in its order, I will be happy.

Well, that is it so far.   I will be working on a couple of swaps, and start getting ready for Fall and Christmas.   On the Professional and personal side, it means cards, cards, and more cards, and for personal, I hope this means a trip to the Mouse's House, Walt Disney World in December.   This trip has been put off so many times for so many reasons.   Pray that it will happen.  I have been planning this family trip since January 2009. I will show and tell next time.

Monday, August 1, 2011

New 3m product

I just wanted to let you know about an offer, especially if you are a scrapbooker.   it is the Scotch Brand dot Roller.   in case you use it, here is the link to get a coupon:

http://offers.3m.com/qfrm/ShowSurvey?surveyid=JOKMHPI0&WT.mc_ev=clickthrough&WT.tsrc=email

Sign up to get a sample of the roller, and get a sample a couple weeks later.   the coupon will appear on the nest page.


Enjoy!

Saturday, July 16, 2011

My Pink Stamper Design team Challange

Challenge:  Make a card, scrapbook page, or other Cricut project with your favorite Cricut cartridge using the following colors......

Orange
Turquoise 
Green
Brown
(other optional color of your choice)
go check it out


I am in another Challenge.  I love doing these things, as well as swaps, because it gets my mind thinking.  Anyway,  I was going to submit my scrapbook page, and then I decided that it was too plain looking.    So I changed it up a bit.    I am going to show the before and the after. 

Here is the before:

 
Recipe for this Layout:

Flower tag :

I used 2 Cartridges for the flower:  Cricut Pagoda and Cricut Essentials:
The Yellow Flower part was actually part of the Flower card on page 55.   i left off the stamen part of the flower.  I cut two flowers, using the cards for another project.   I have layered the flowers by placing a pop dot in between the two.   I edged the flower with a Copic marker, Burnt Umber #E29.  Next I cut out a square from Cricut Essentials Cartridge, which you can only find installed in the  Cricut Expression 2, 5th Anniversary Edition at the moment (not sure if this is one of the ones that will be released in a separate cartridge).   If you have this machine, you can find the square on page 33 of the handbook.   If not, and you have another Cricut machine (such as the 1st edition expression machine), then there is one on the George and Basic Shapes Cartridge page 111.   The square was cut at 2" while the inside was cut at 3".

Background Page:

i used paper from Close to My Heart to make the background.   I cut 3 sheets of 12x12 paper down to 4 x4 pieces, then I staggered them  at 1 1/2.   I formed a pocket with the other two by adhering all but the left side of paper.   I cut off the extra, by using the brown paper as a guide.  with an opaque white  gel pen by Signo, I decorated the pockets.  I love this pen, and I got it three weeks ago.  It is better than the souffle pen I was using for doodling.   

First element:  Strip of color
I made a card last month, and I had some extra pieces of the stripe at the bottom of the page.   it is easy to do.  All it takes is a white piece of paper (12x12), and assorted color of different paper (I used Bazzill.)  Cut all but the white paper into 1" strips.  You only need one of each color. Next adhere the strips onto the white paper.  Next, you will cut the whole sheet in strips, going horizontal.   This will include all the colors, and make it as though it is one sheet. 
I matted the photo of my lovely family (I am at the end) with Coordination's paper. 

Now the After....


As I said in the beginning, I was making the page, and something struck me as I was not feeling the above page at all., so I decided to make some changes.  They say that change is good.  well this one is so sweet.   After all, I want to show my best work.   So what did I change?

The Flower Tag:

I did not mention the button, but the button for the center was there from the beginning.   I decorated the corners, and slid the tag down to the bottom.   This made room for me to angle the picture.   

Background paper:

I did not adhere the picture nor the mat down in the first photo, because I was not sure of the background, and I was right the second time around.   Changing the background makes to picture pop.  The orange mat just sat there.   I also decorated the mat with the white gel pen.   I also cut out an Eiffel Tower for the back ground.  The Eiffel Tower comes from the Summer in Paris Seasonal Cartridge, an it was cut at 4".   I simulated lights at the bottom part of the tower, and colored the little flag pole with the white gel pen.    I scribe the words "Family" under the picture in white gel pen as well.     

It has been a couple months since I completed a scrapbook layout, and even longer since I did one less then 12x12.   I did this, because I wanted to see if I could do it, and I am very proud of it.   I will catch you later.

Tuesday, June 28, 2011

New card scraplift time and copyrights

Hello-

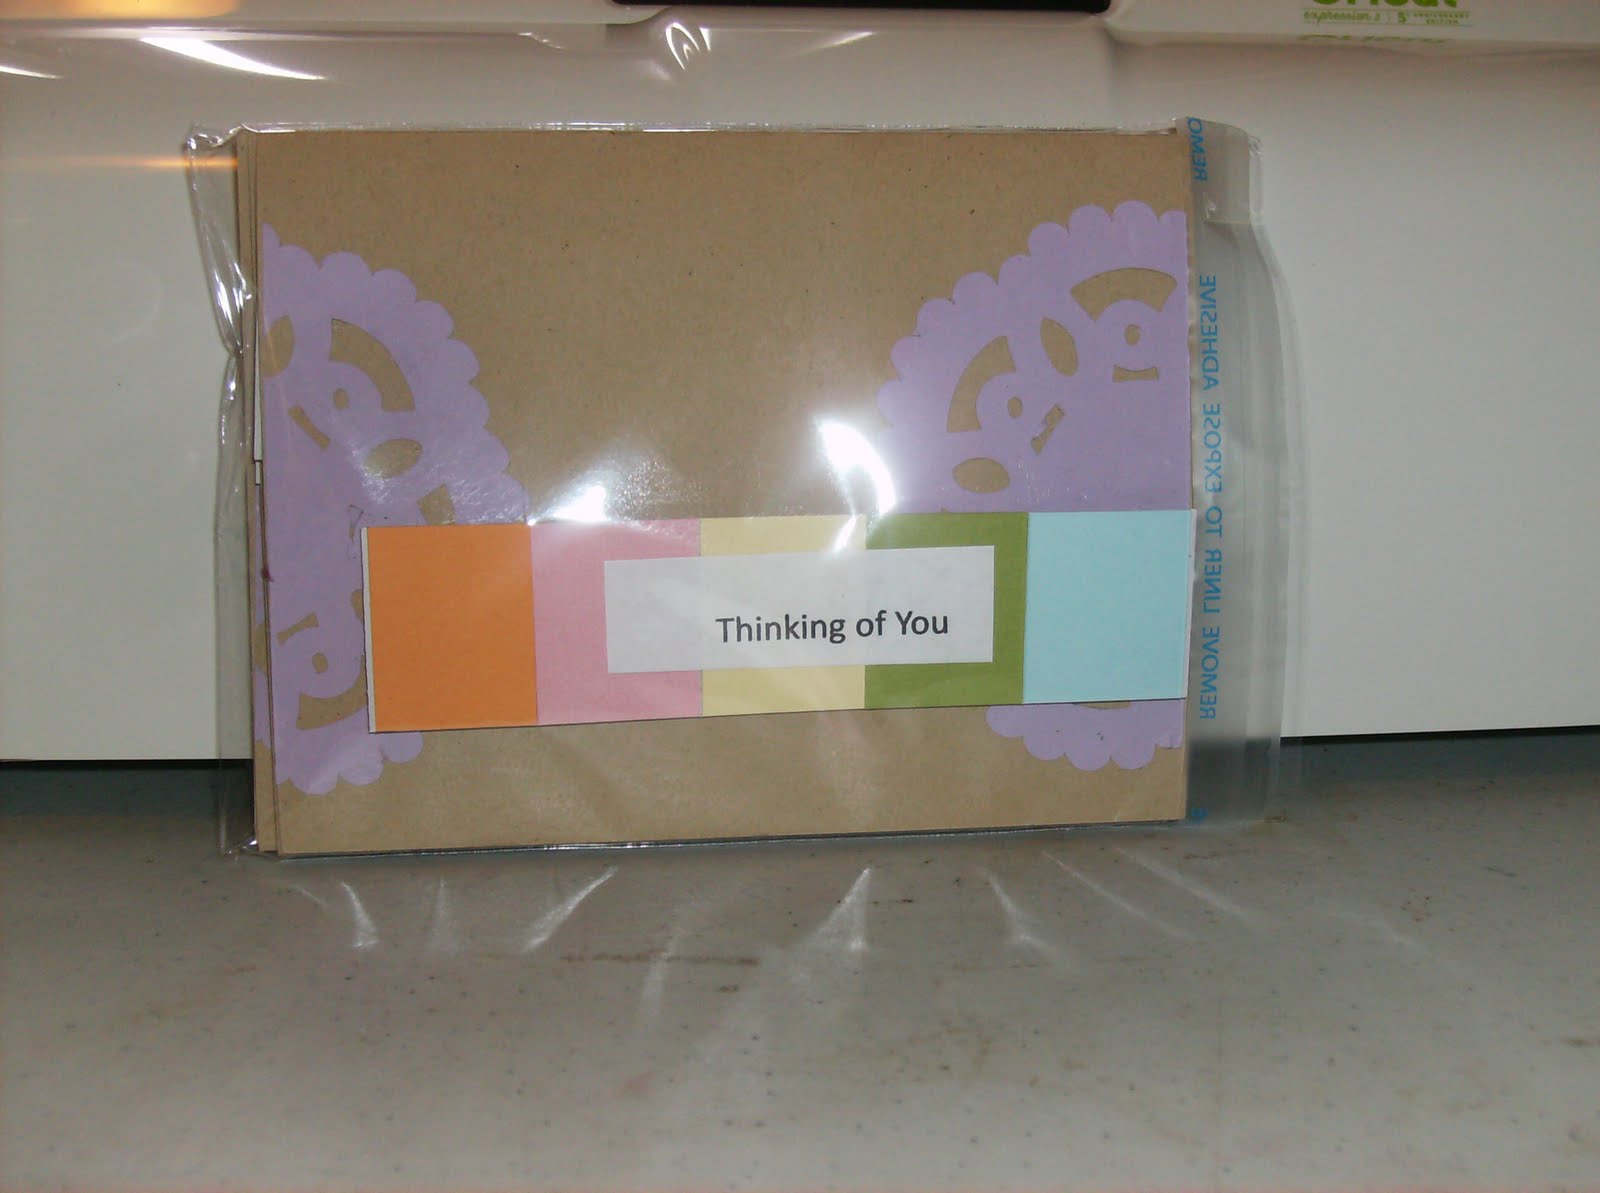
I am doing OK, other than my usual allergies.   A couple days ago, I was thinking of the cards that I would make for my mom.   In my last post (or somewhere in there), I stated that I had a project.  Mom wanted some Thank You cards, and some Thinking of you cards.  I made the thank you cards, and gave them to her (why I did not take a picture, I will never know), anyway, I took a picture of the first batch of TOY cards (Funny how the acronym spells toy, LOL.) Any way, it is a scraplift card.   A scraplift is project previously made by someone else.  You like it so much, until you have to make one of your own, sometimes in your own interpretive way, because you often do not have the exact materials that the original person used for the project.  At least that is my way of thinking about it.    I am going to let you ponder that for a moment, as I will get back to the subject later on.

Original card, Copyrighted by Papertrey ink
This is the original card, made by the blogger at Papertrey Ink.  I like this card for its simplicity, but the card looks complicated.  First of all, the card has a white card blank, with a Kraft cardstock mat. On the mat itself, the design was done with this technique:   The person took a mask, and dabbed white ink on it, so the mask can act as a stencil.  When the mask is lifted, it reveals an imprint.  Next the person edged out the mat with the same white ink, to soften the edges.   For the sentiment, it was stamped in black ink, and there are actually six different cardstock papers in a block formation.   The papers were first cut in strips, and glued to the back of the foundation paper, which I assume was white.  That made one sheet.   Then that sheet was cut into strips to make the blocks on the paper.  
There are other ways to achieve this look.  First of all, you can stamp color ink on the white strip.  The problem for me is this can get a little messy, and you have to wait until the other colors dry completely, before applying the sentiment.  Doing it this way is also time consuming.  You can always use a heat gun to dry it, but that may make the paper curl up, or holding it too close to the heating gun may cause it to burn.  To make time go faster, you can always digitize the whole thing.    In other words, use the computer for the blocks of color as a background, and the sentiment.  This is nice if you are in a hurry, and you do not mind making a hybrid card.   Hybrid cards combines the use of both traditional and digital scrapbooking and card making.  It also is great for people who do not like the look of their own handwriting.
The final step for this card is to place the strip in front of the stamped image, and rounding the corners.

Now for my version of this card:

My version of this card.
I usually have mats on my cards, but for this one, I decided to go "Au Natural" with it.  I want to start by explaining the strip itself.  I did the same thing, except I cheated.  I printed on separate sheet of paper, "Thinking of You", instead of doing it on the strip itself.   On thing that I am learning how to do (but have not quite mastered it yet) is where to print on the paper.  It can be done, but at this time, I am chicken, and I have messed up some perfectly good paper for that cause, too.  For this, I use a cheater method for printing on paper.  Sure, I could have used vellum, but I was not thinking about that at the time.  Oh well, next time, I have some strips left (four cards worth.).   Next, I enlisted the help of my Cricut E2 machine, and used the preloaded cartridge Cricut American Alphabet for the image, and I just glued the die cut to the card, but not before I split it in half.  I put both halves on the card, and positioned the strip just like the original card.  To raise it, I put pop dots behind it.

Now for the Materials:
 On the original, all materials used for this project was by Papertrey ink.   Go here to look at all of their products.   I love their products, and I highly recommend this company.   For my materials, the card blank is from Stampin Up!, and the strips of color paper is from a stash pack purchased at Pizazz-It, a LSS whose last day of business was Sunday.   I will truly miss them.   All but 3 LSS have closed up, and now the Central Ohio community is left with just big box scrapbooking stores (Mike's, Joann, and Archiver's.)
I recommend that you give Scraplifting a try.   If you are hesitant, don't worry, read on...

Copyright

This is my opinion, and my opinion only.   If you still have doubts about Scraplifting, please research, but what I am about to say is true and just:   For you own personal scrapbooking and other paper-crafts, when you are stumped for ideas, it is OK to use someone else's work, IF it will stay within your personal space to be shared with family and friends.  Many companies with angel policies state this on their websites.  Also, this is where your personal research comes into play.  In the case, between me and my mom, she wanted me to make her some cards, and she is family, for her to give to the rest of the family and her friends.   That is as far as it gets there.   I put up a disclaimer on this blog, stating that these designs are my designs alone, unless I scraplift.  When I scraplift, I give credit where credit is due, in this case it is Papertrey Ink, and I do my homework, BEFORE attempting anything.
For example, Provo Craft has an angel policy which allows a crafter to sell their creations 200 times per image, per cartridge a month.   This does not mean you can take a cupcake die cut image and make 200 pillows out it, then 20 cakes, then 100 cards with that same image.   It means 200, period.   Now, the Cricut police probably will not be on my doorstep if I do 201 images per cartridge, per month, but still it keeps me in check. (At least they did not when I cranked out 400 + tags over the Christmas holiday for a client who ended up not paying for them.) Also stated in that angel policy is where you can sell your creations with their die cuts on them.  You cannot sell that item in retail stores, but you can sell on places like Ebay, Etsy, and craft fairs.   You also cannot sell the images themselves, anywhere, and you cannot rent out the cartridges for profit.   I know of a couple of LSS who were issued warning letters from PC.
My motto is "when in doubt, check it out."  It makes me feel better when I am able to share with you .   It also makes me feel better when I start my own stamp line in the future.
Well that is it for today.   Take care, and God Bless You.

Monday, June 20, 2011

A Pink Stamper Challenge

This is a late post, so this is the challenge...

Create something with a birthday theme.   So for my challenge, I choose a Cricut card, utilizing the Cricut American Alphabet.   This is one of the cartridges preinstalled in the CE2, E2, or Cricut Expressions 2, 5th Anniversary Edition Cutting Machine, if you want to use the long version of its name.   One of my favorite LSS (Local Scrapbooking Stores) is closing its doors at the end of the month, and I bought some random scraps they had.   So everything cut out of the cart was using that stack.   So I cannot give exact colors I used, but I can give you the brand name, which was Bazzill Cardstock.  
One of the pieces I had for the card base, I cut down to form 2 4x6 card blanks.   It was about a light pink.   The mat was a Bazzill Bling, I think a Pink Cadillac color (again it was in the stack of colors), and the width was perfect (3.75"), and I cut the length to about a 1/4 of an inch from the actual card base (5.75"), and that made 2 as well.  One for each card.   I took black cardstock, which was about 6"x 12", and cut 2 cupcakes from the CAA Cartridge.   the cupcake was 4", and if you have the E2 machine, the one I used is on page 49 of the handbook.   Press the backout button on the screen.  For the top layer to form the decrotive swirl on the "frosting" portion.   use the Cpcke2-s one.   The color I used was light green Bazzill cardstock.   Before I used pop dots, or dimensions, I spritz it with Glimmer Mist.   You do not have to do this step if you do not want to.   I used Dazzling Diamonds for all over, and Moonlight for the bottom.   The way I spritz it was I covered the top part after the Dazzling Diamonds got a chance to dry, which only takes 5 seconds, or less.   I put a napkin over the "frosting" portion, and spritz the bottom with the Moonlight.   Yes, there is an easier method.   You will have to spritz the pieces before adhering them together.  When cupcake is dry, you can adhere it to the card. 
Next I had some butterflies from Delights, which is from American Crafts.  It is the from the Sunbeam Collection.   They are patterned butterflies, and yes, I could have cut them from another cart, but the look I was going for, I did not have the right cart for the butterfly, plus I wanted something made with chipboard, and was patterned.   At the bottom, I just simply printed "Happy Birthday" on the card.   I often use my computer, but this is one of the few times I feel confident about my handwriting, and I wanted it handmade.   So without further ado, here are my 2 cards:


Happy birthday card 1


Happy Birthday card 2


Well that is it for now.    Have a blessed week.


Thursday, June 2, 2011

Quick blog post: What is on your desk...

I am not sure why I entered this, except I follow Creations with Christina (http://www.creationswithchristina.com/), and I saw this post.   She was asking the question, What is on my desk.   Well, here is my challenge (and just to let you know Christina, I have TWO desk I scrapbook on, my computer and a crafting table):


Picture #1 has a far shot of my crafting desk, Picture #2 has both desk together, and Picture #3 has a close up of my crafting desk.  I have not quite finished cleaning up from an envelope swap I finished doing.   I am still in the middle of making my mom's cards.

Well that is a quick blog post, and the end of my Challenge.  Good night, and God Bless you.